I don’t know about you but I always had a love hate relationship when trying to catch an Abra in the original Pokémon games – especially when completing a Nuzlocke Challenge. I always enjoyed the Abra evolution line and it was one of my staple Pokémon during my childhood. At least once you evolved them or needed an easy escape from a Zubat infested cave.
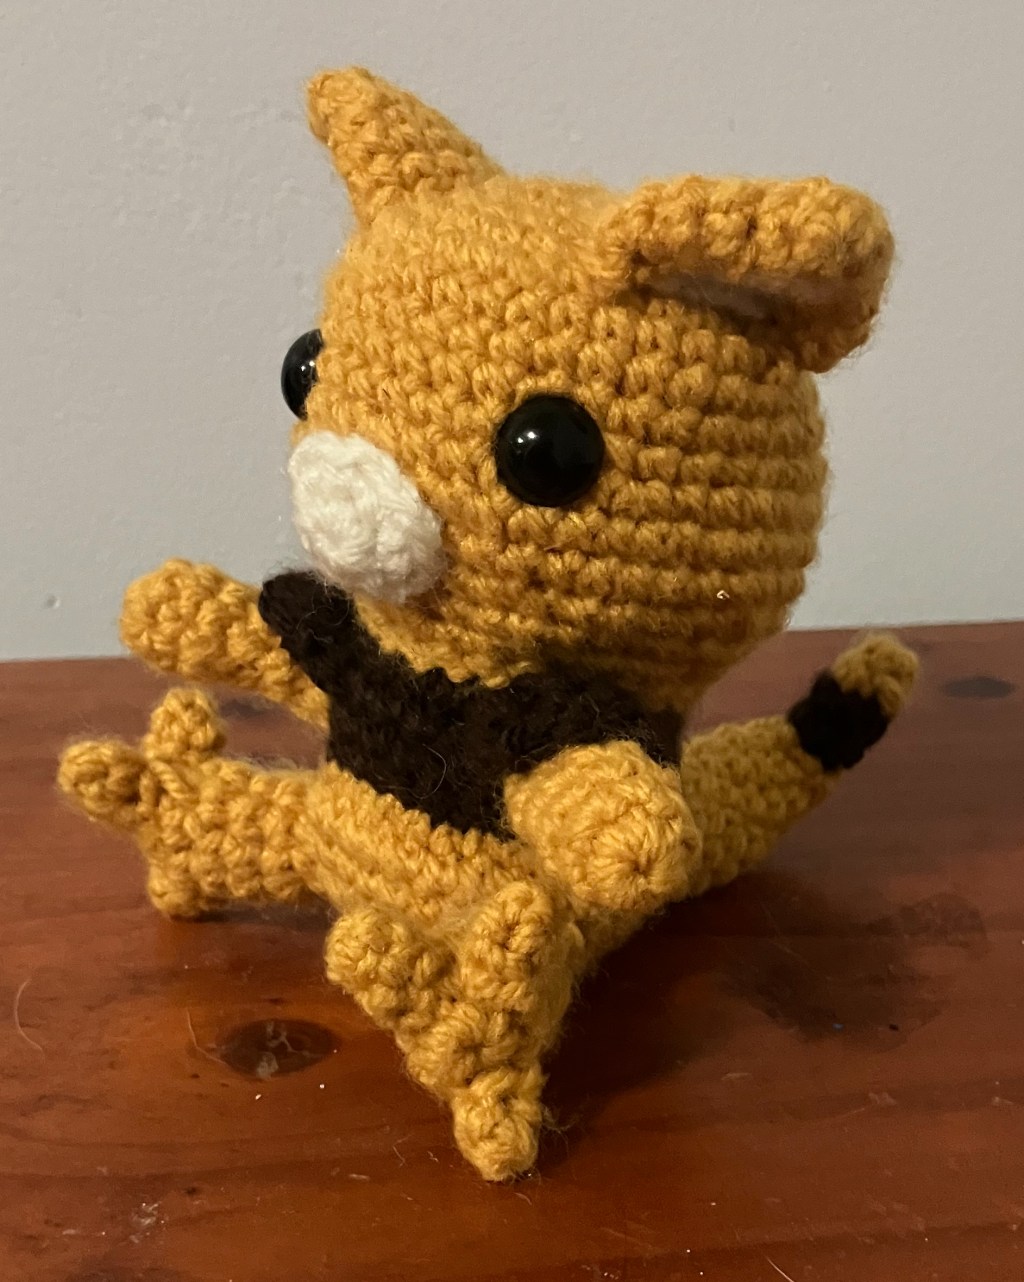
Well there is no need to hate them anymore!!! Here is my Funko Pop style pattern, based on the patterns I learnt from 53 Stitches. Abra is one of the first patterns I’ve developed myself so I am eager to hear your input. It went through a couple of demo trials to find something I was comfortable with sharing so I hope you enjoy it as much as I enjoyed developing it!
It is a relatively easy and basic design for beginners to follow provided you know how to change colours during a pattern – the trickiest part otherwise is the toes as they are small so can be fiddly to invert to the correct way to get the appropriate shape. The trick I found was to start pulling it correctly while completing the second row.

Notes:
- I will summarise how many loops are countable at the end of each row in brackets
- You need to be comfortable changing colours between and during rows
- When completing a ch during colour change don’t forget we usually skip this & ss in next stitch.– take this in mind when counting during the row.
- If multiple colours are used for a different part I will note in superscript which colour to complete the crochet in. eg. scY x2, scC, scY x3 = x2 sc in yellow, x1 in cream then x3 in yellow
- Please ensure you change colours appropriately to account for multiple colours in one row:
- above example = x1 full yellow, transition to cream, transition to yellow, x3 full yellow
- If I do not note the colour of a row/crochet assume it is the same colour as the previous row/crochet
- Please ensure you change colours appropriately to account for multiple colours in one row:
Materials
Yarn Colours – I use PANDA 100% acrylic 8PLY/DK:
- Mustard Yellow (Y) COL 1088
- Dark Brown (B) COL 0312
- Cream/Off White (C) COL 309
Crochet Hook 3.5mm
x2 Black safety eyes or black yarn/embroidery yarn
Stuffing
Threading Needle
Scissor
Stitch Abbreviations
MR – magic ring
sc: single crochet
ss: slip stitch
ch: chain
inc: increase single crochet – x2 crochet in same stitch
dec: decrease single crochet – skip one stitch when placing next crochet
hcc-scX>Y – half colour change single crochet – create the tower of the crochet in X colour & create the loop with Y colour
hcc-spX>Y – half colour change spike crochet – create the tower of the spike crochet in X colour & create the loop with Y colour.
Finish Off: place slip stitches in until you are happy it is level then slip knot and cut end. I usually leave enough tail to attach part but do whatever is comfortable for you to attach the parts.
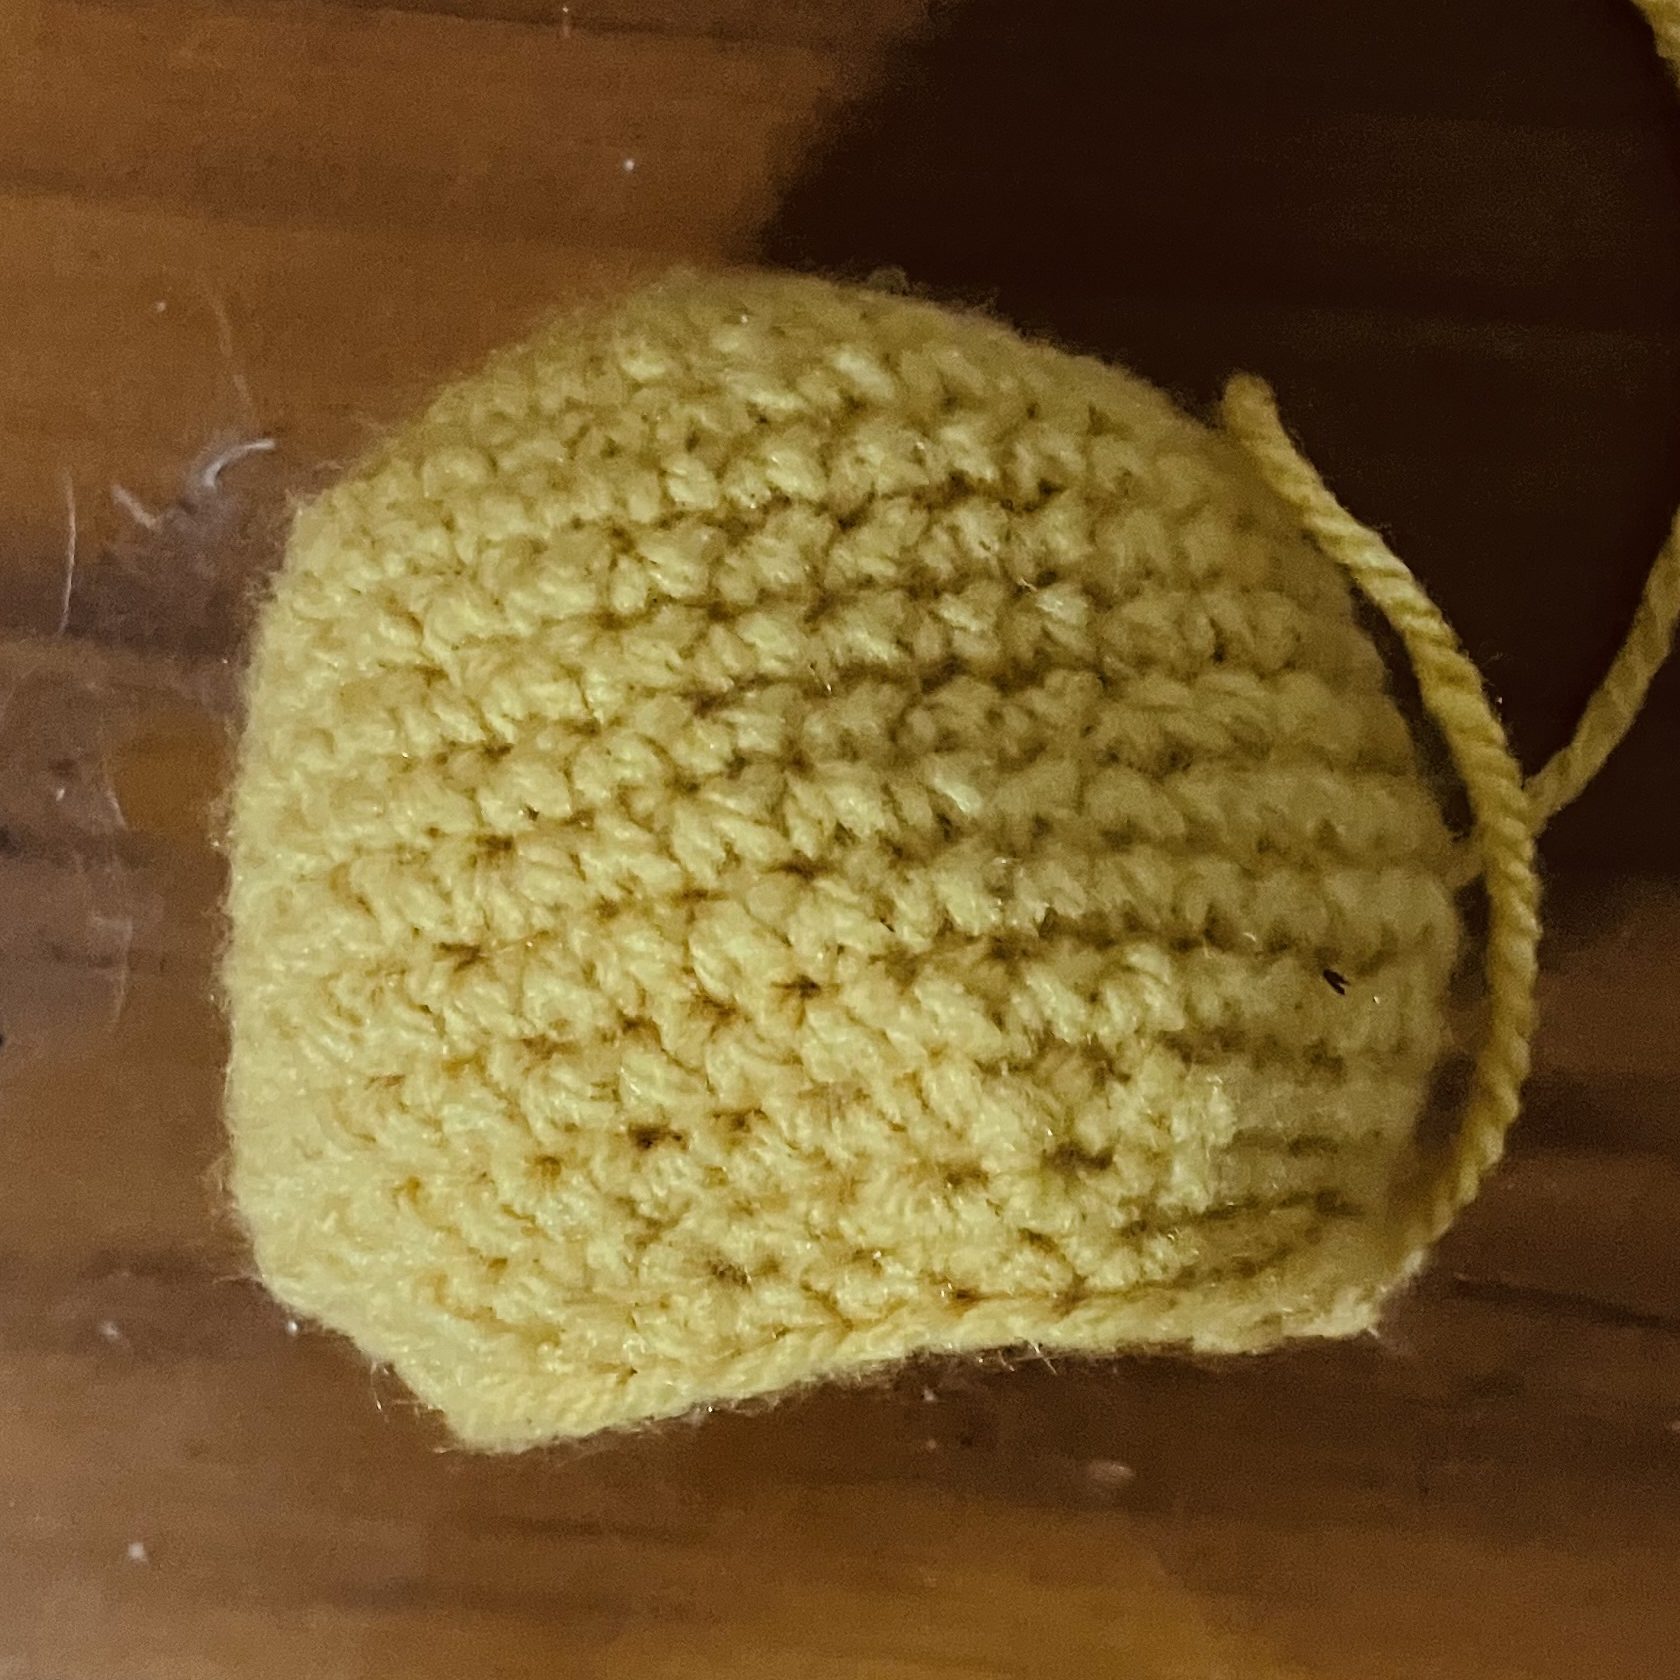
Head – Make 1
Colours: Mustard Yellow
1. MR 6 (6)
2. inc. – x6 (12)
3. inc, sc – x6 (18)
4. sc, inc, sc – x6 (24)
5. inc, (sc x3) – x6 (30)
6. sc x2, inc, sc x2 – x6 (36)
7.-10. sc – x36 (36)
11. inc, sc x5 (42)
12.-13. sc – x42 (42)
14. dec, sc x5 – x6 (36)
15. sc x2, dec, sc x2 – x6 (30)
16. dec, sc x3 – x6 (24)
Finish Off
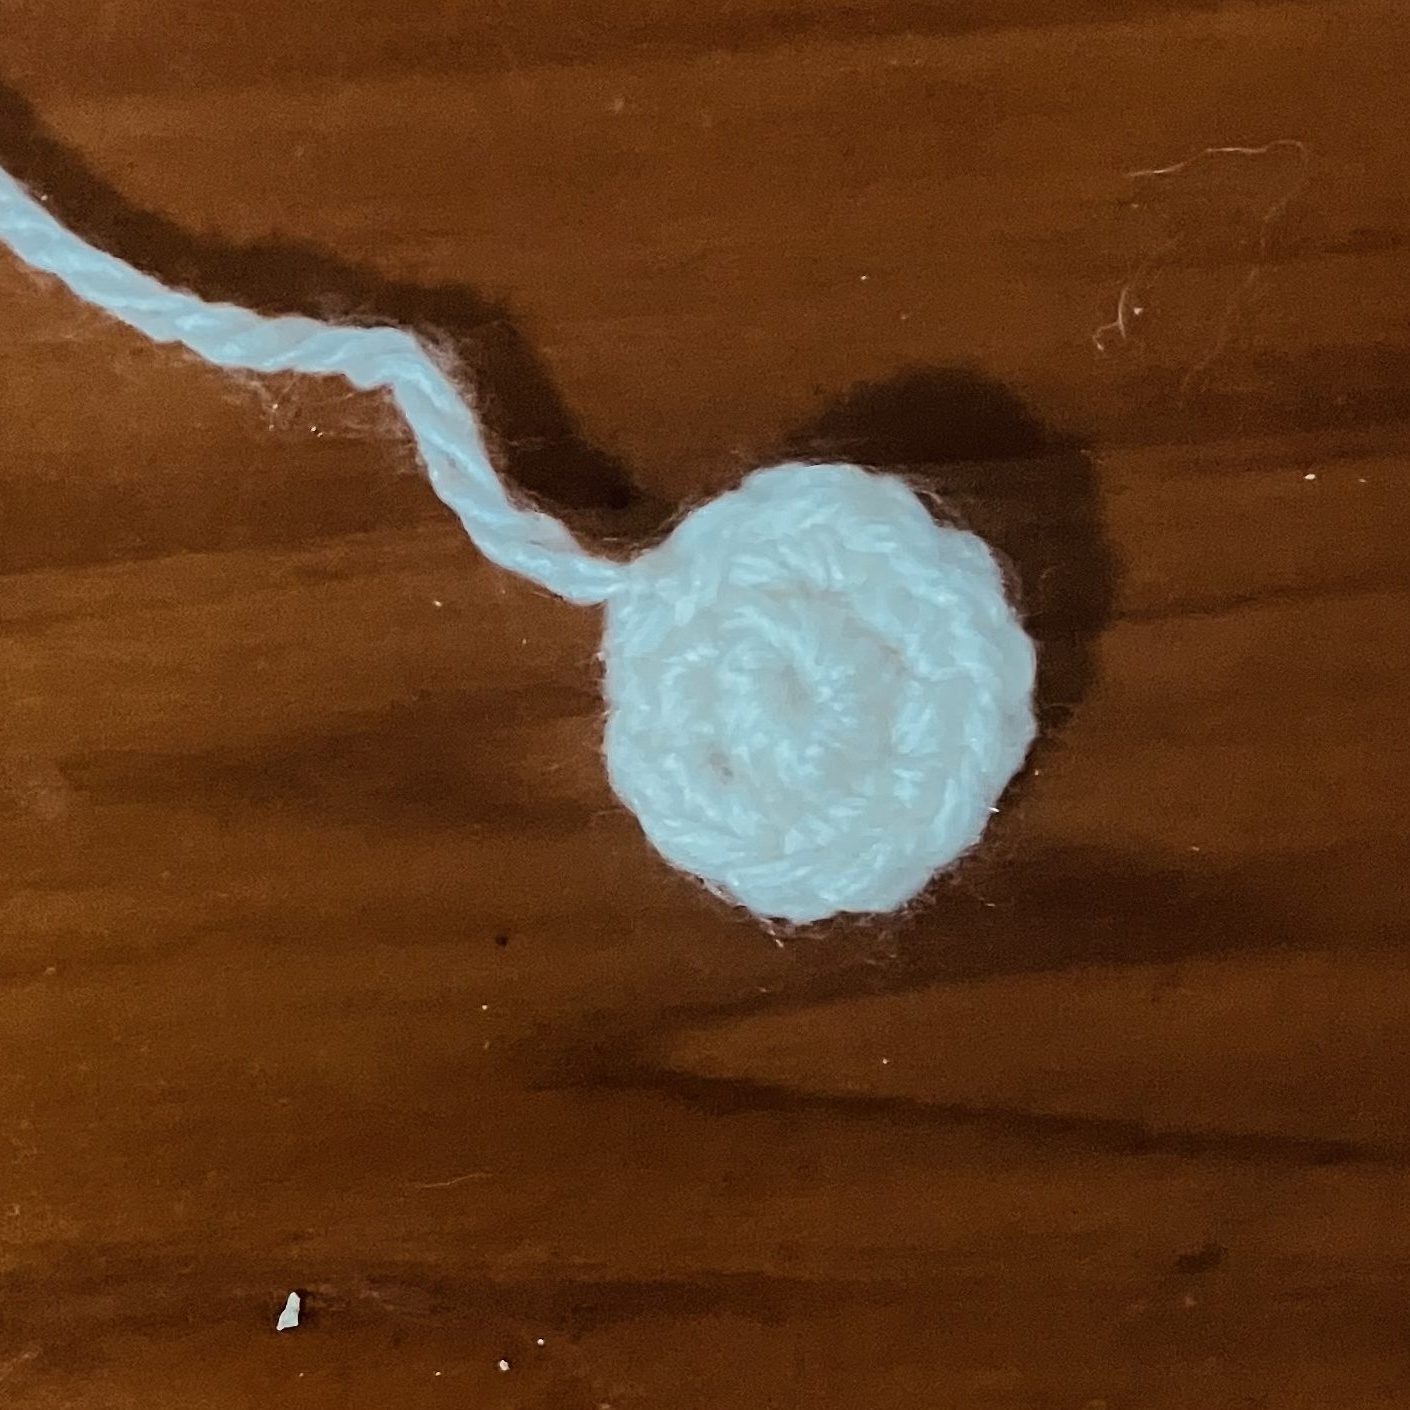
Nose – Make 1
Colours: Cream
1. MR 6 (6)
2. inc, – x6 (12)
Finish Off – 2-3 ss, First ss pull tail of MR through as this is usually large enough to attach to head
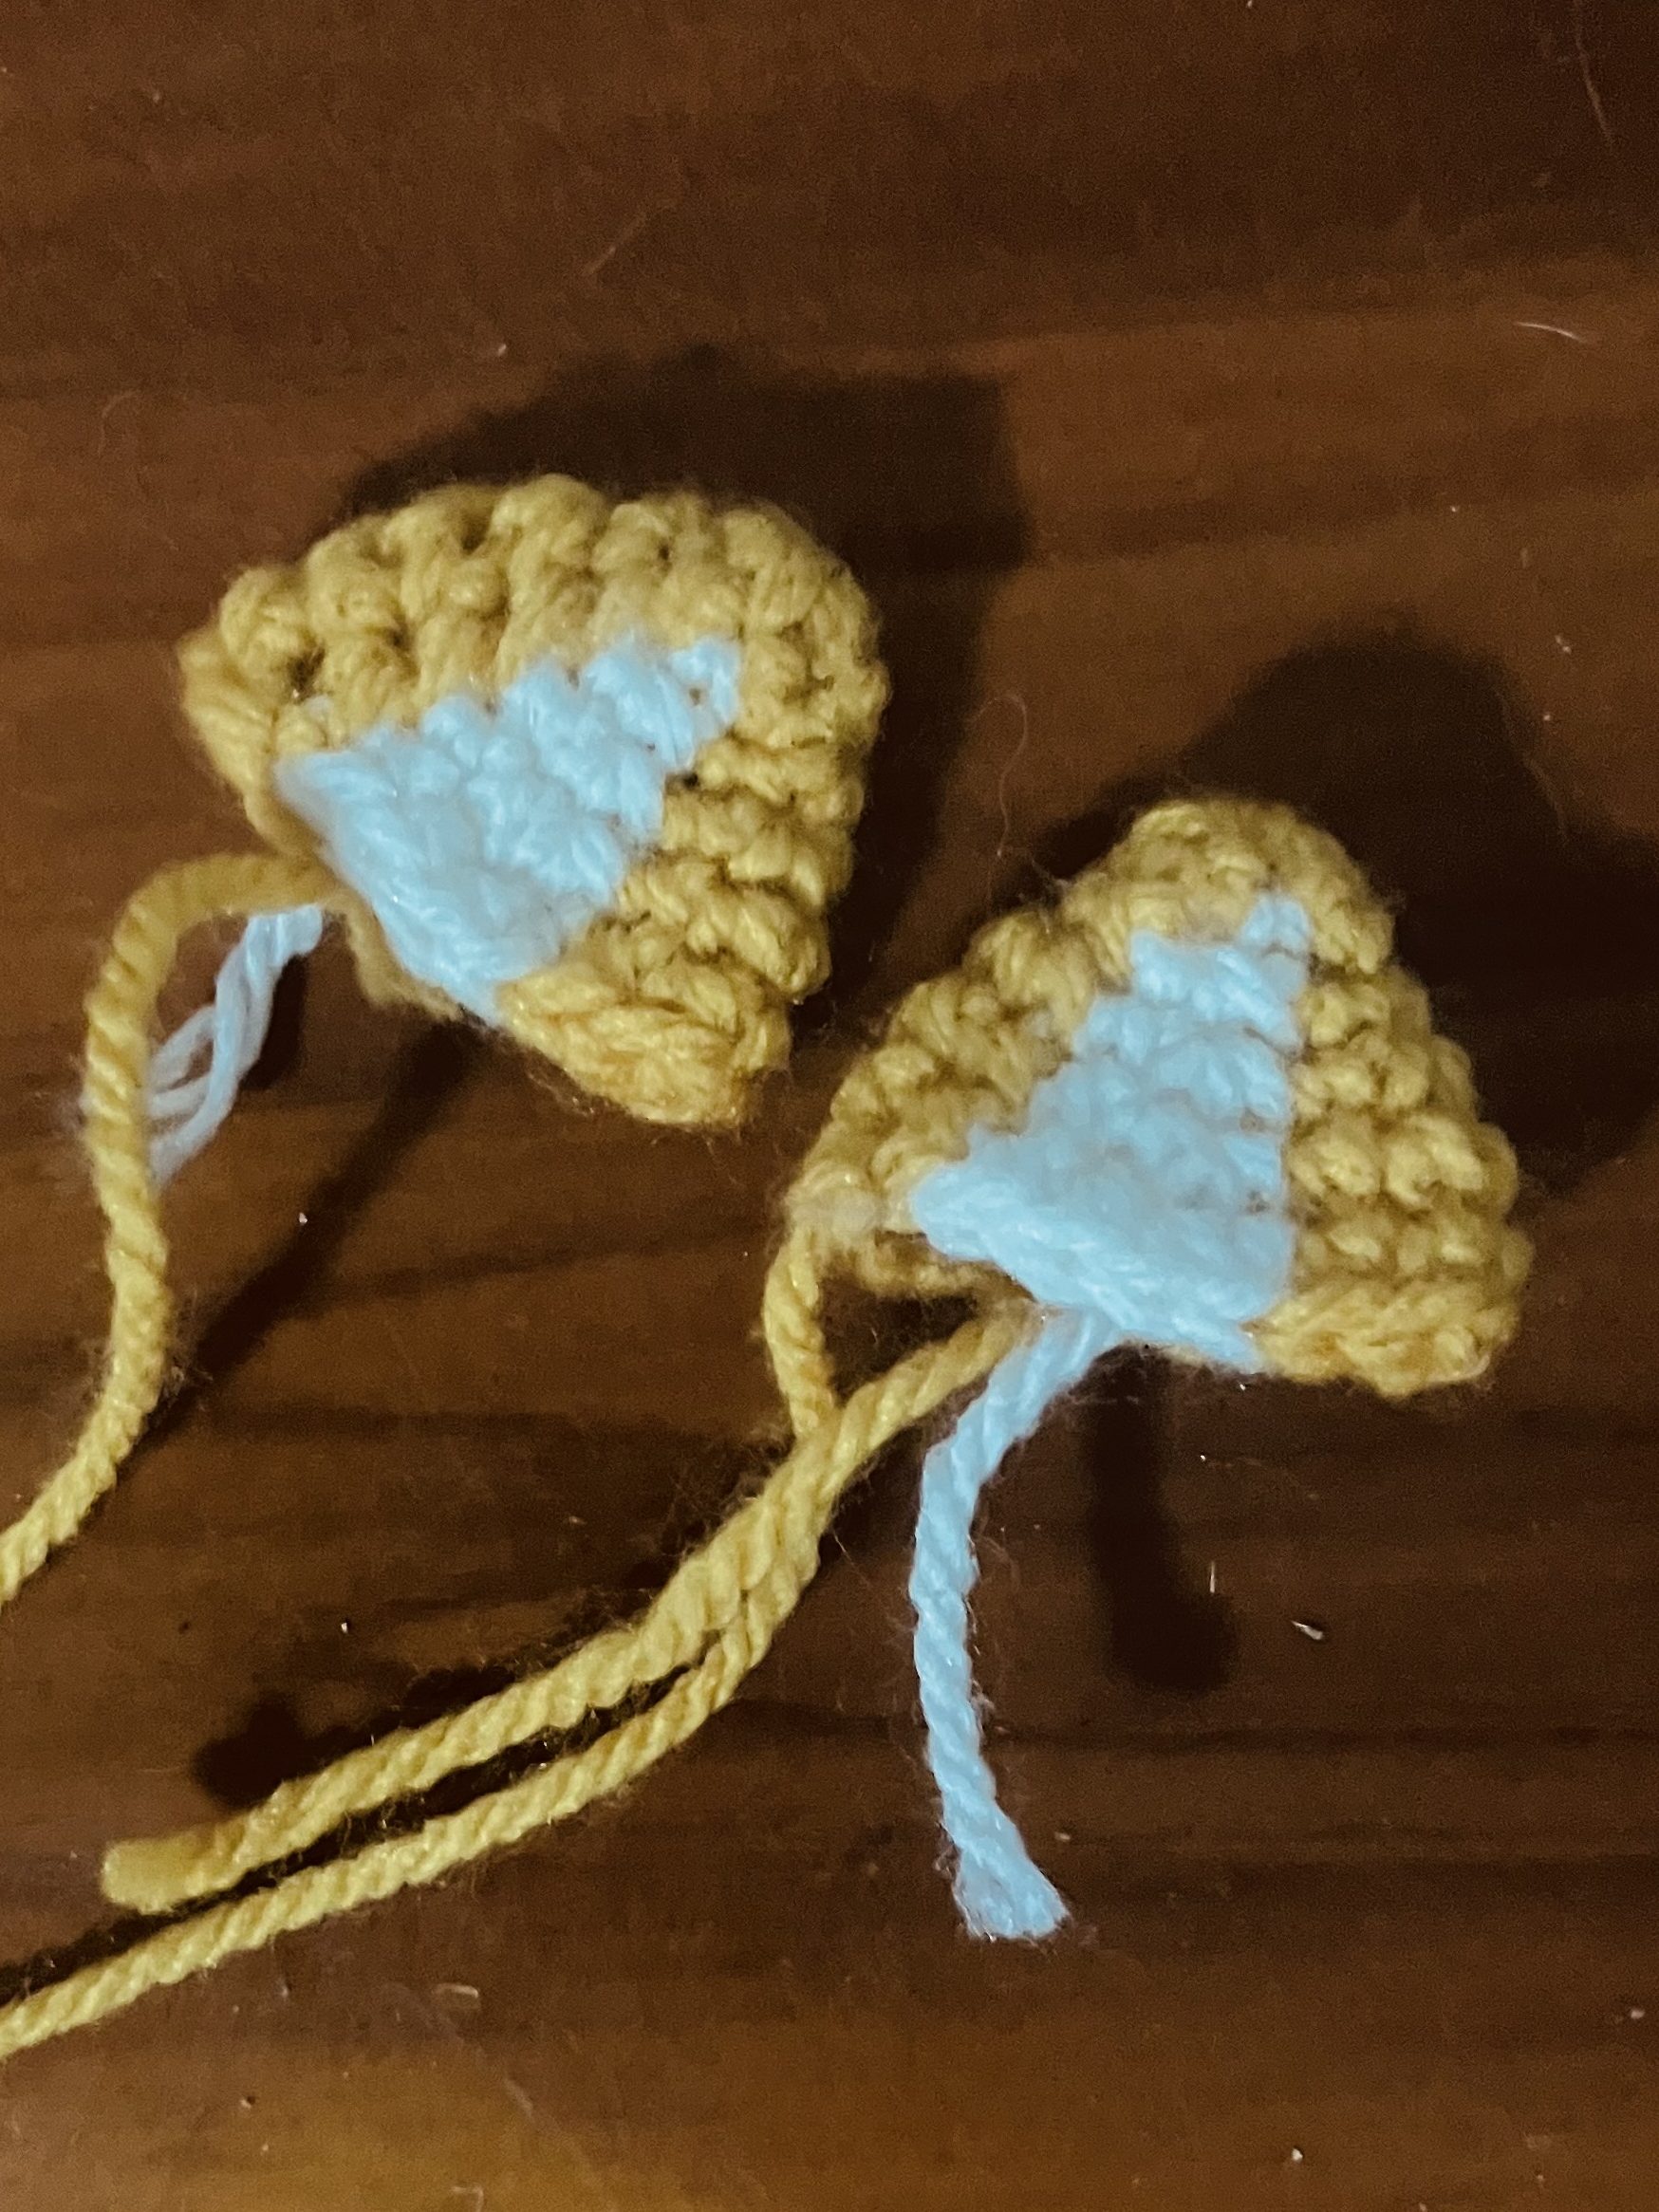
Ear – Make 2
Colours: Mustard Yellow, Cream
1. MR 6Y
2. scY x2, scC, scY x3 (6)
3. incY x2, incC, (sc, inc x2)Y (11)
4. (sc, inc, scx2)Y,(sc, inc)C, (sc, inc, sc, inc, sc)Y (15)
5. sc x5Y, (scx2, inc)C, sc x7Y (16)
6. sc x5Y, sc x4C, sc x11Y (16)
Finish Off
Body – Make 1
Note – you change colours from row 8 to 9. If you have a preferred method to swap row please follow that. We also change back in row 12 and this is to provide a neater join for the head & body. If you find these Tsc stitches difficult then just do regular stitches here.
1. MR 6Y (6)
2. inc. – x6 (12)
3. inc, sc – x6 (18)
4. sc, inc, sc – x6 (24)
5. inc, (sc x3) – x6 (30)
6.-7. sc x30, (30)
8. ssY, chB, hcc-scY>B x29, hcc-sp Y>B*, ssB (30)
9. chB, sc, dec, scx2, (dec, sc x3) x5, ss** (24)
10.-11. sc – x24 (24)
12. ssB, chY, hcc-scB>Y x23, hcc-sp B>Y*, ssY (24)
Finish Off
* place this stitch into ss at start of row. If Tsp pull tower tight
** skip chain if it’s tight & place into next loop, or loop front loop of ch like a dec if its large.
Leg – Make 2
Colours: Mustard Yellow
1. MR 6 (6)
2. inc, sc – x3 (9)
3.-6. sc – x9 (9)
Finish Off

Toe – Make 6
Colours: Mustard Yellow
1. MR 3 (6)
2. inc, sc x3 (4)
Finish Off
Arm – Make 2
Colours: Mustard Yellow
1. MR 6 (6)
2. inc, sc x2 – x2 (8)
3.-4. sc – x8 (8)
5. dec, sc x6 (7)
6. sc – x7 (7)
Finish Off
Shoulder Pad – Make 2
Colours: Dark Brown
1. ch 7 (7)
2. sc – x6 (6) *on last sc pull tail through to weave in next row
3.Turn, sc – x5 (5)
4. Turn, sc – x4 (4)
Finish off by ss x2 down side of piece for the tail to attach to the body
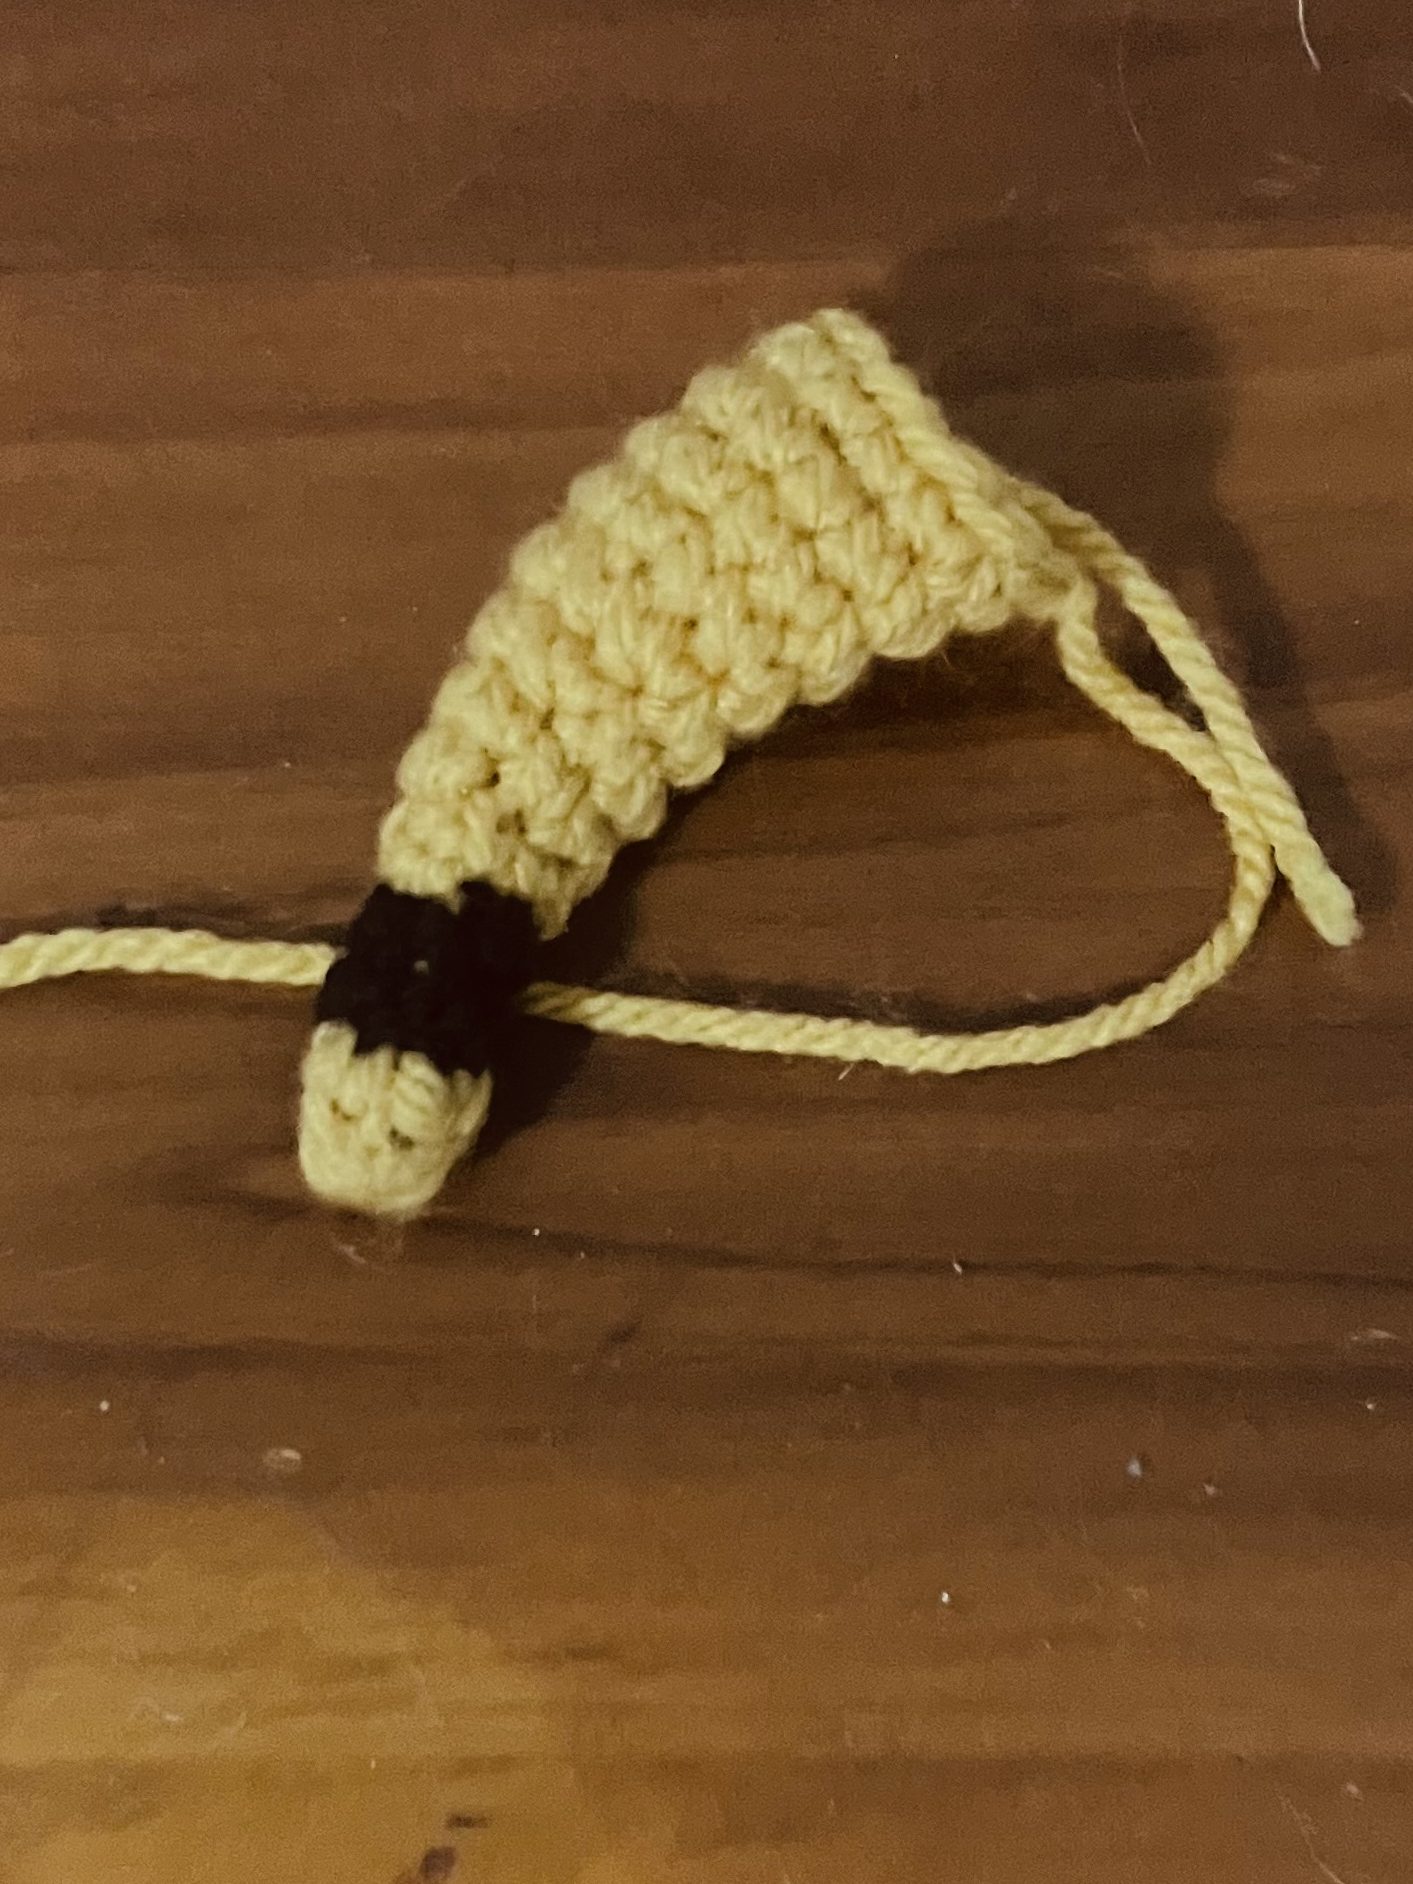
Tail – Make 1
Colours: Mustard Yellow, Dark Brown
Note – you change colours from row 2 to 3 and 4 to 5. If you have a preferred method to swap row please follow that instead.
1. MR 6 (6)Y
2. ssY , chB, hcc-scY>B x6, hcc-spY>B*, ssB**, ch (6)
3. inc, sc x5, ss* (7)
4. chY, hcc-sc B>Y x6, hcc-spB>Y*, ssY* (7)
5. chY, inc, sc x6 (8)
6. inc**, sc x7 (9)
7. inc, sc x8 (10)
8. sc x10 (10)
9. inc, sc x4 – x2 (12)
10.-11. sc – x12 (12)
12. inc, sc x11 (13)
13. sc x13 (13)
Finish Off
* place this stitch into first stitch of row not chain. If Tsp pull tower tight
** skip chain if it’s tight & place into next loop, or loop front loop like a dec if its large.
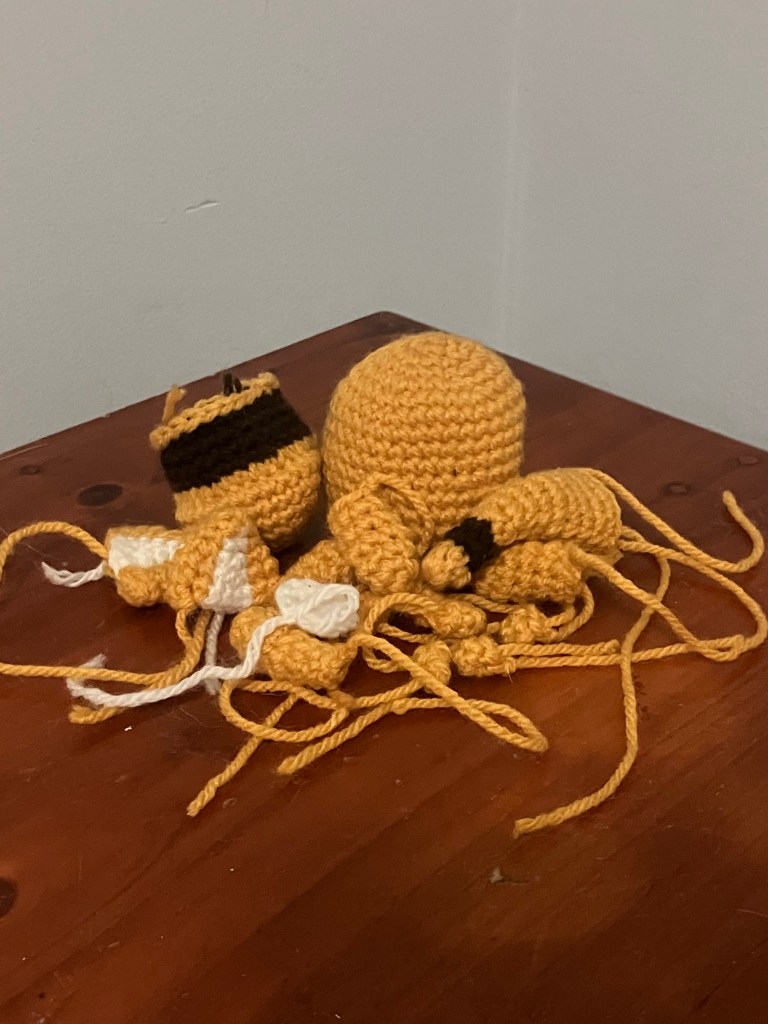
Assembly
Once you have all your pieces made we need to assemble them together. I usually start with attaching the head and body together.
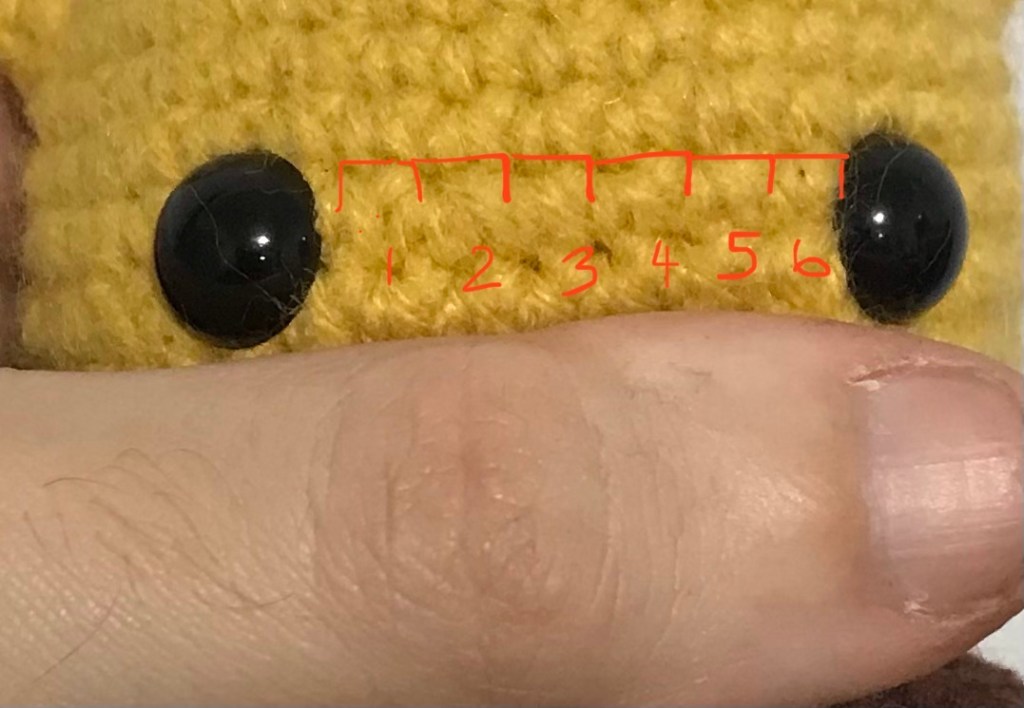
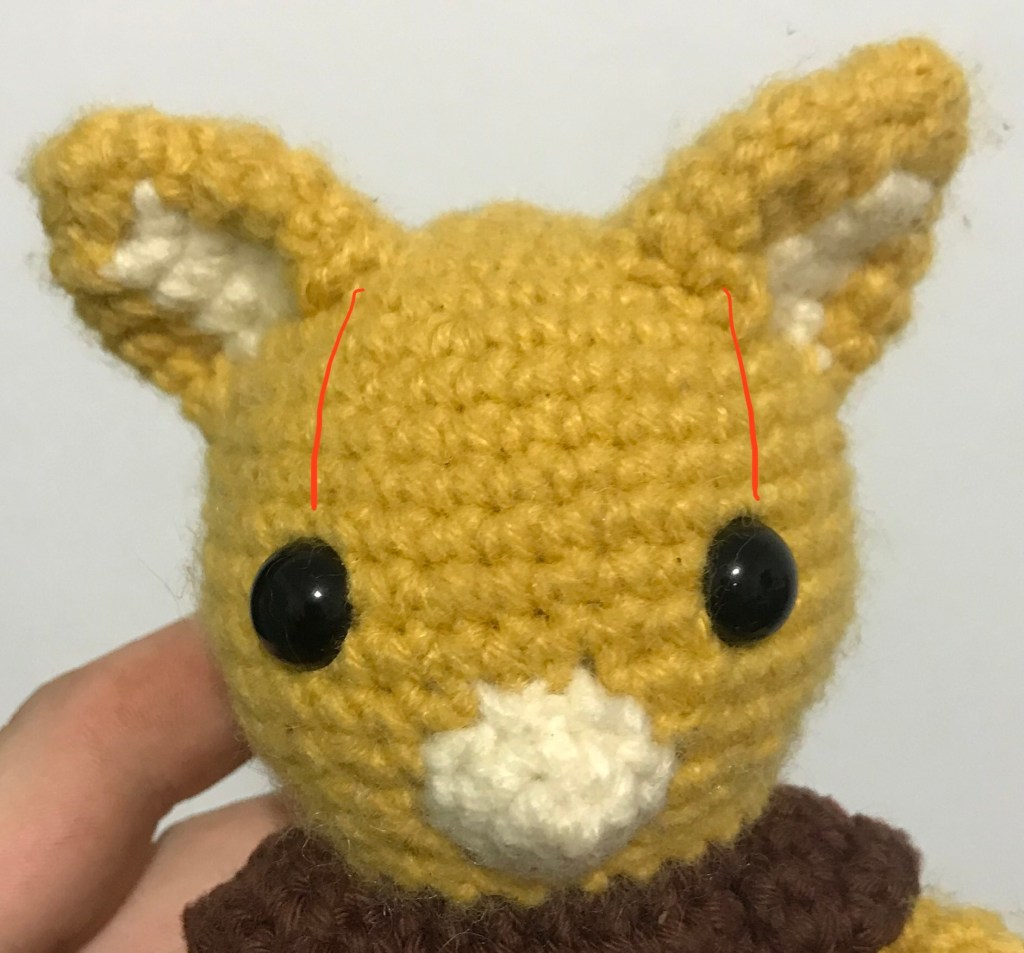
First partially stuff both pieces so the shape can be maintained while you decide where you eyes are going. Most of the time my eyes are inserted between rows 10 & 11 of the head and once inserted I can count 6 crochets between them. Technically they will be 8ish crochets apart from point of entry but the eye covers one on either side. Find a place that suits you. The reason I place my eyes first is because although when you stuff it tight at the end there can be some slight deformity due to the pattern and I like to minimise this as best I can. This deformity is just from the inc & dec.
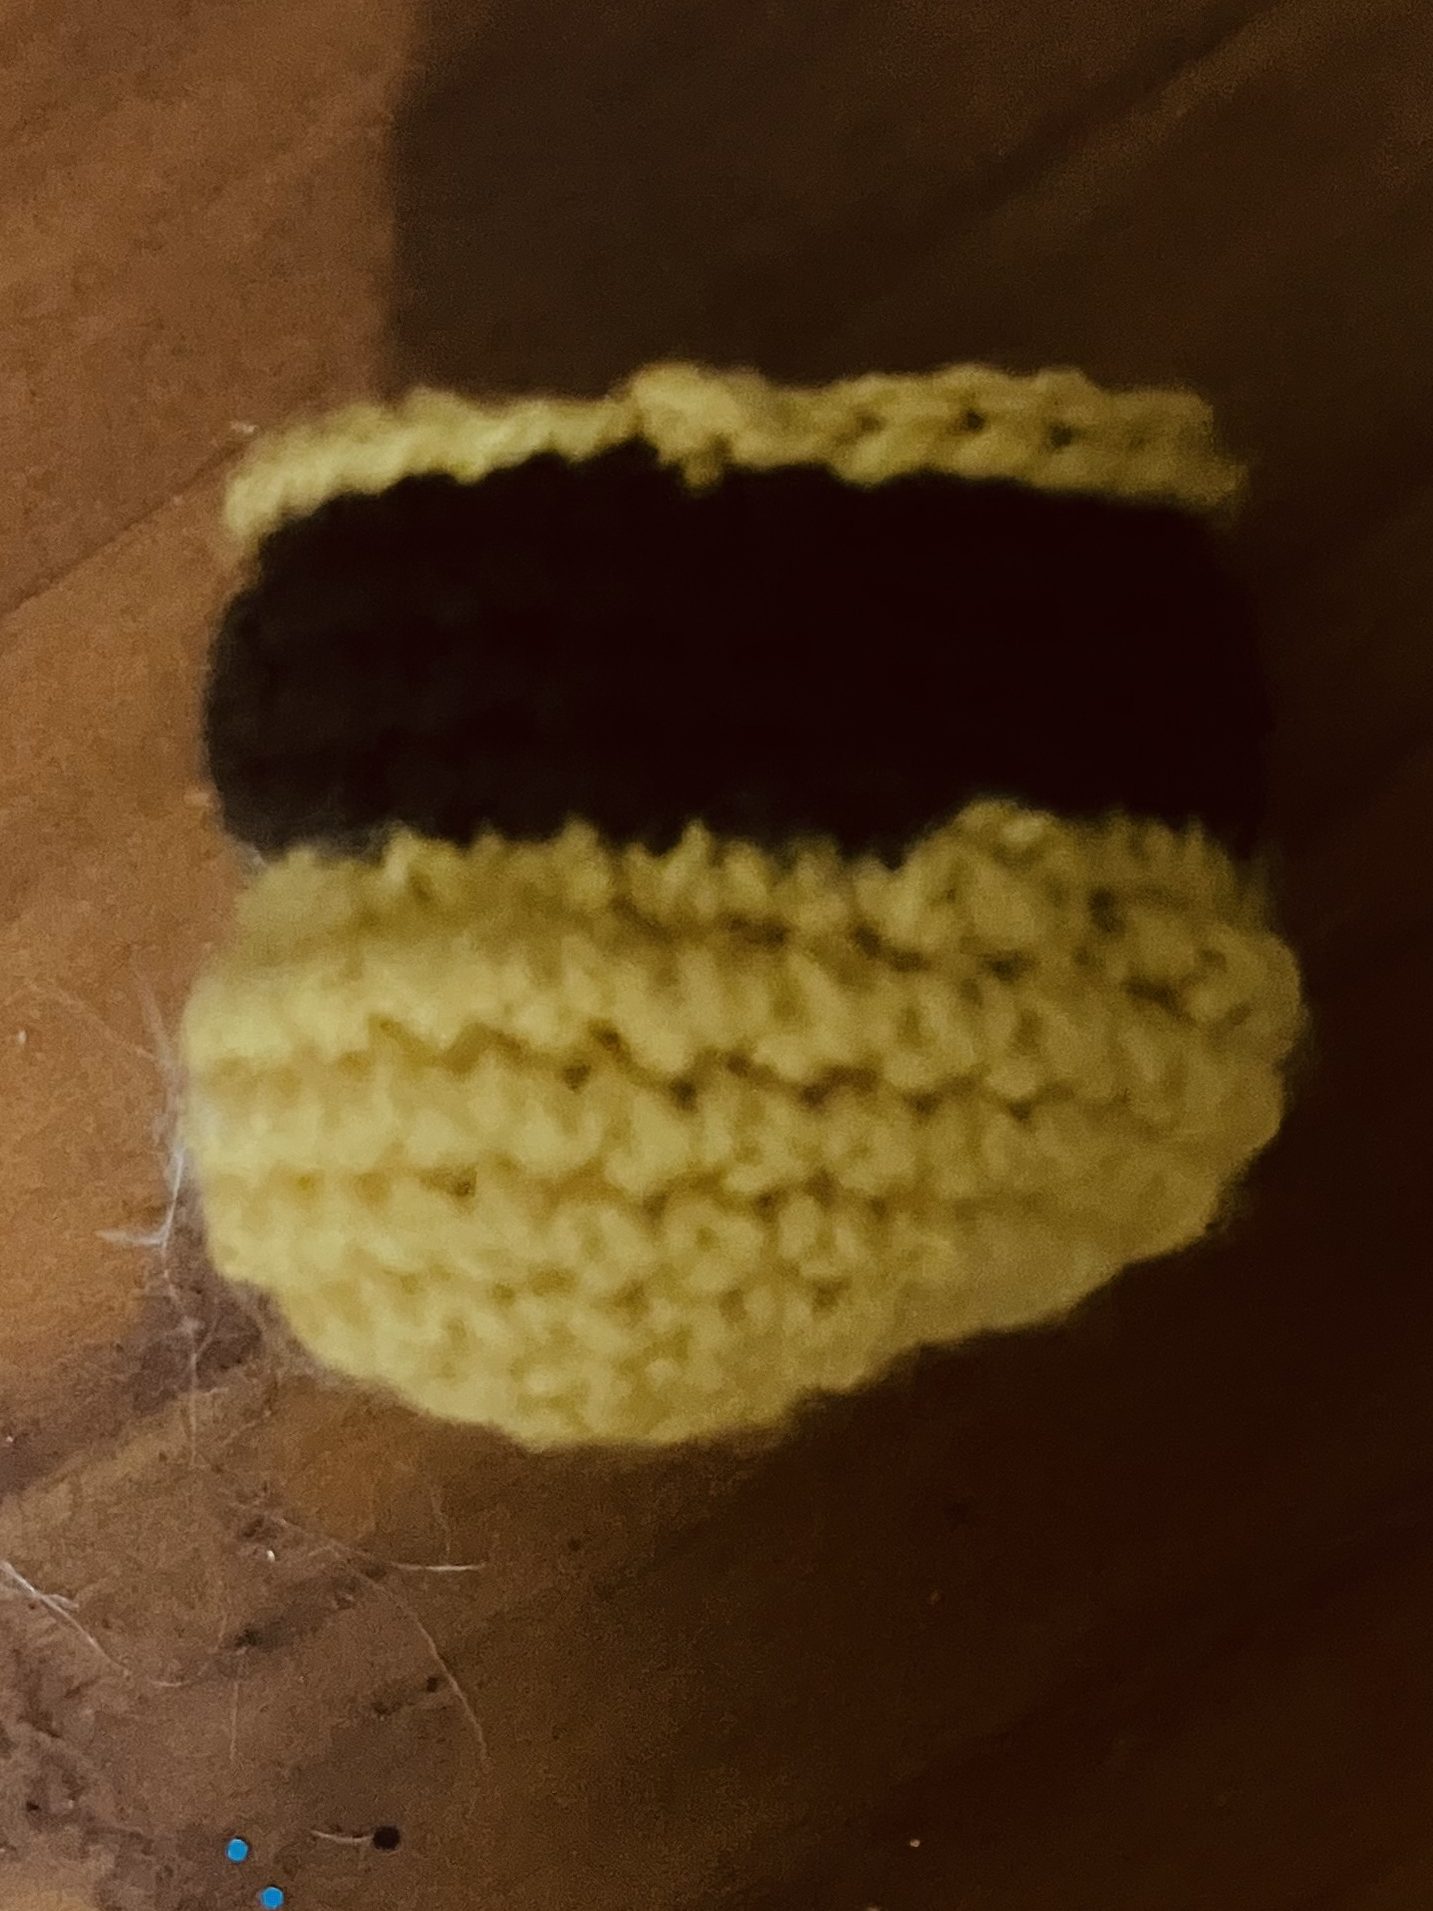
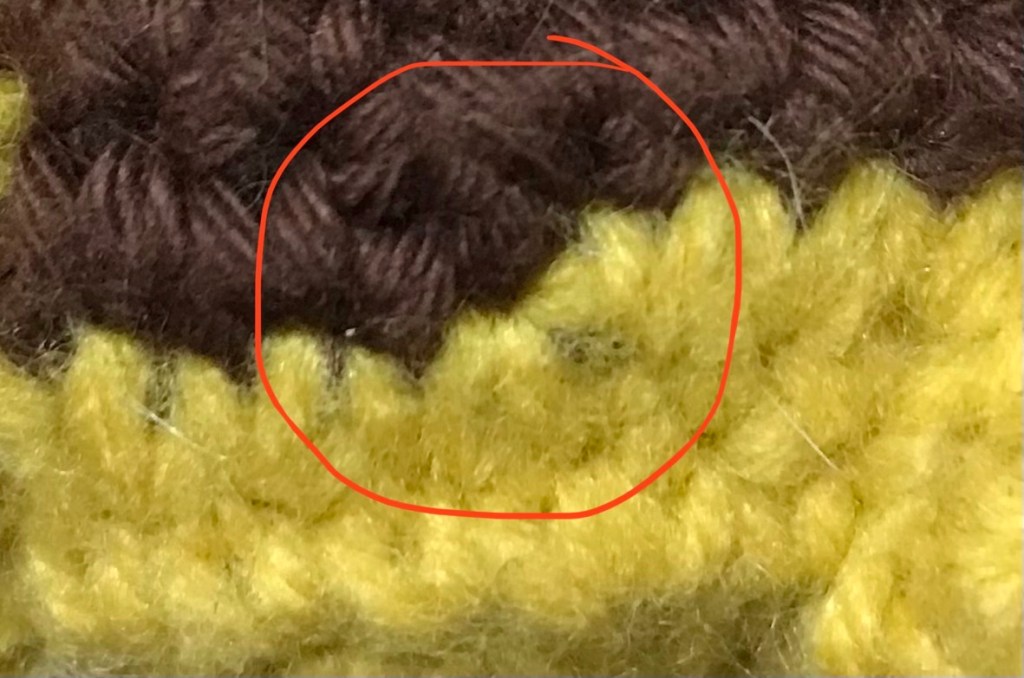
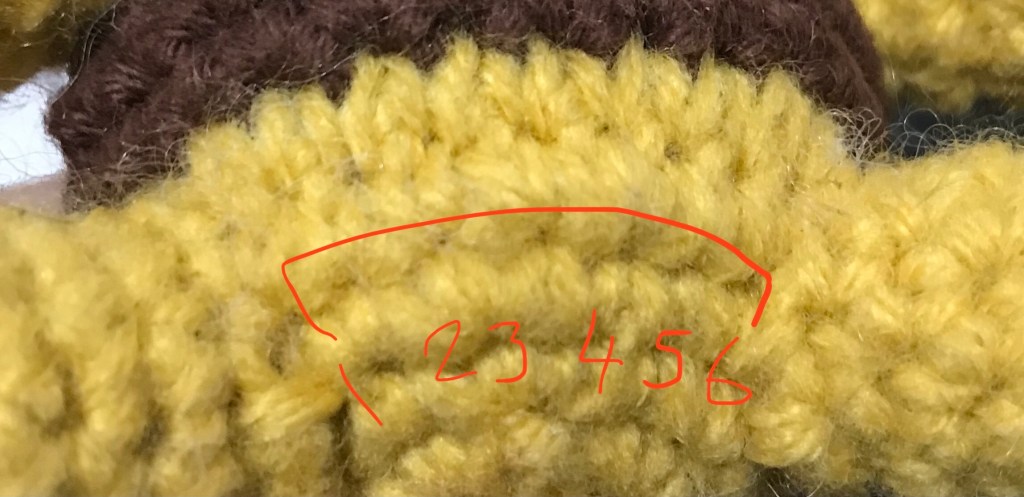
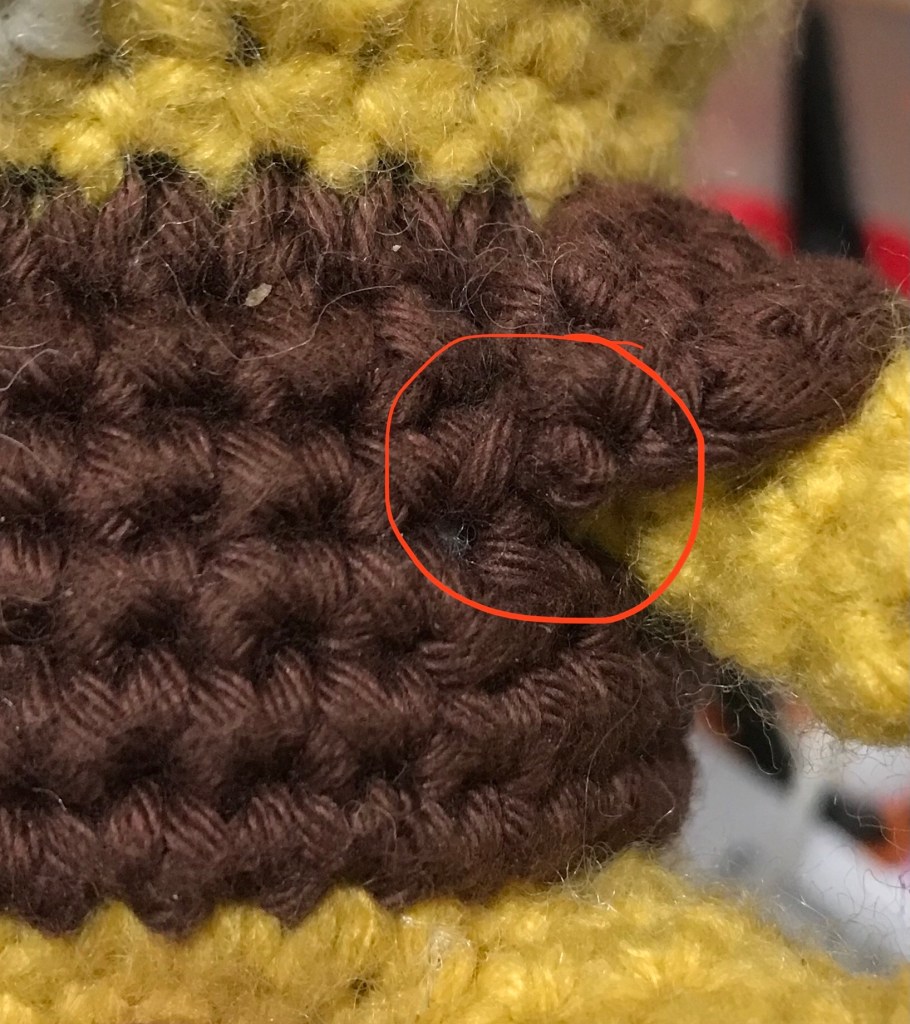
Once the eyes are attached, position your head so your eyes are on the opposite side of where the yellow transitions to brown on the body. Aim to get this transition point in between the eyes on the backside. We do this so we can hide this transition point behind the tail when that is attached. Please see the image below for clarity on what the transition point looks like. Attach your head and body together and before you finish the last few stitches finish stuffing the inside to your desired squishiness.
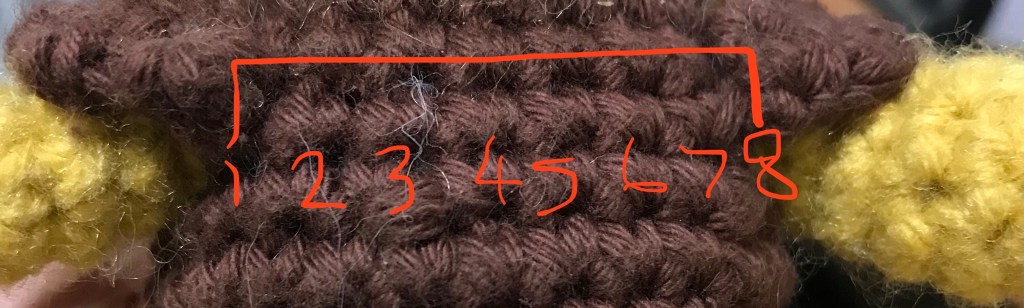
Next I usually attach my legs and arms. Lining them up with my eyes my legs are usually spaced 6 crochets apart from each other, counting from row 5 of the body, and my arms are 8 crochets apart from one another, counting from row 10/11. I usually stuff the legs a smidge to help hold the shape but you don’t usually need to stuff the arms.
With the appendages attached we can place the tail. Stuff your tail and ensure that there is a nice, even, gentle increase in the diameter of the tail then line it up so the legs are equidistance apart from the tail and attach. When done correctly when you view it from a birds eye position this should fall right in between your toy’s eyes.
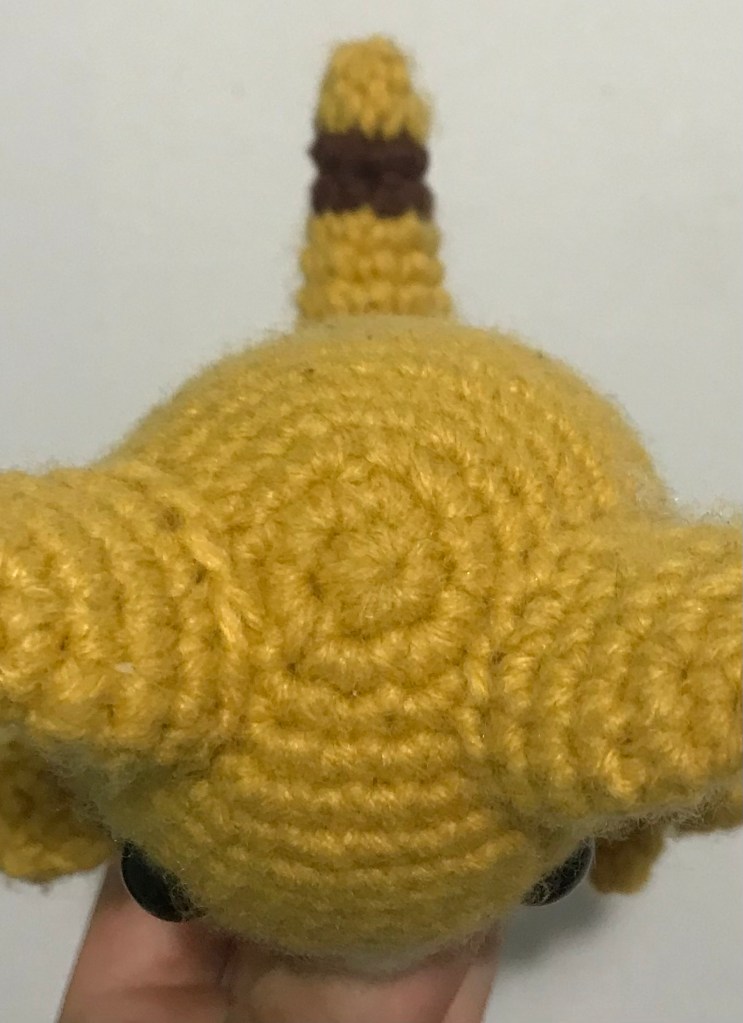
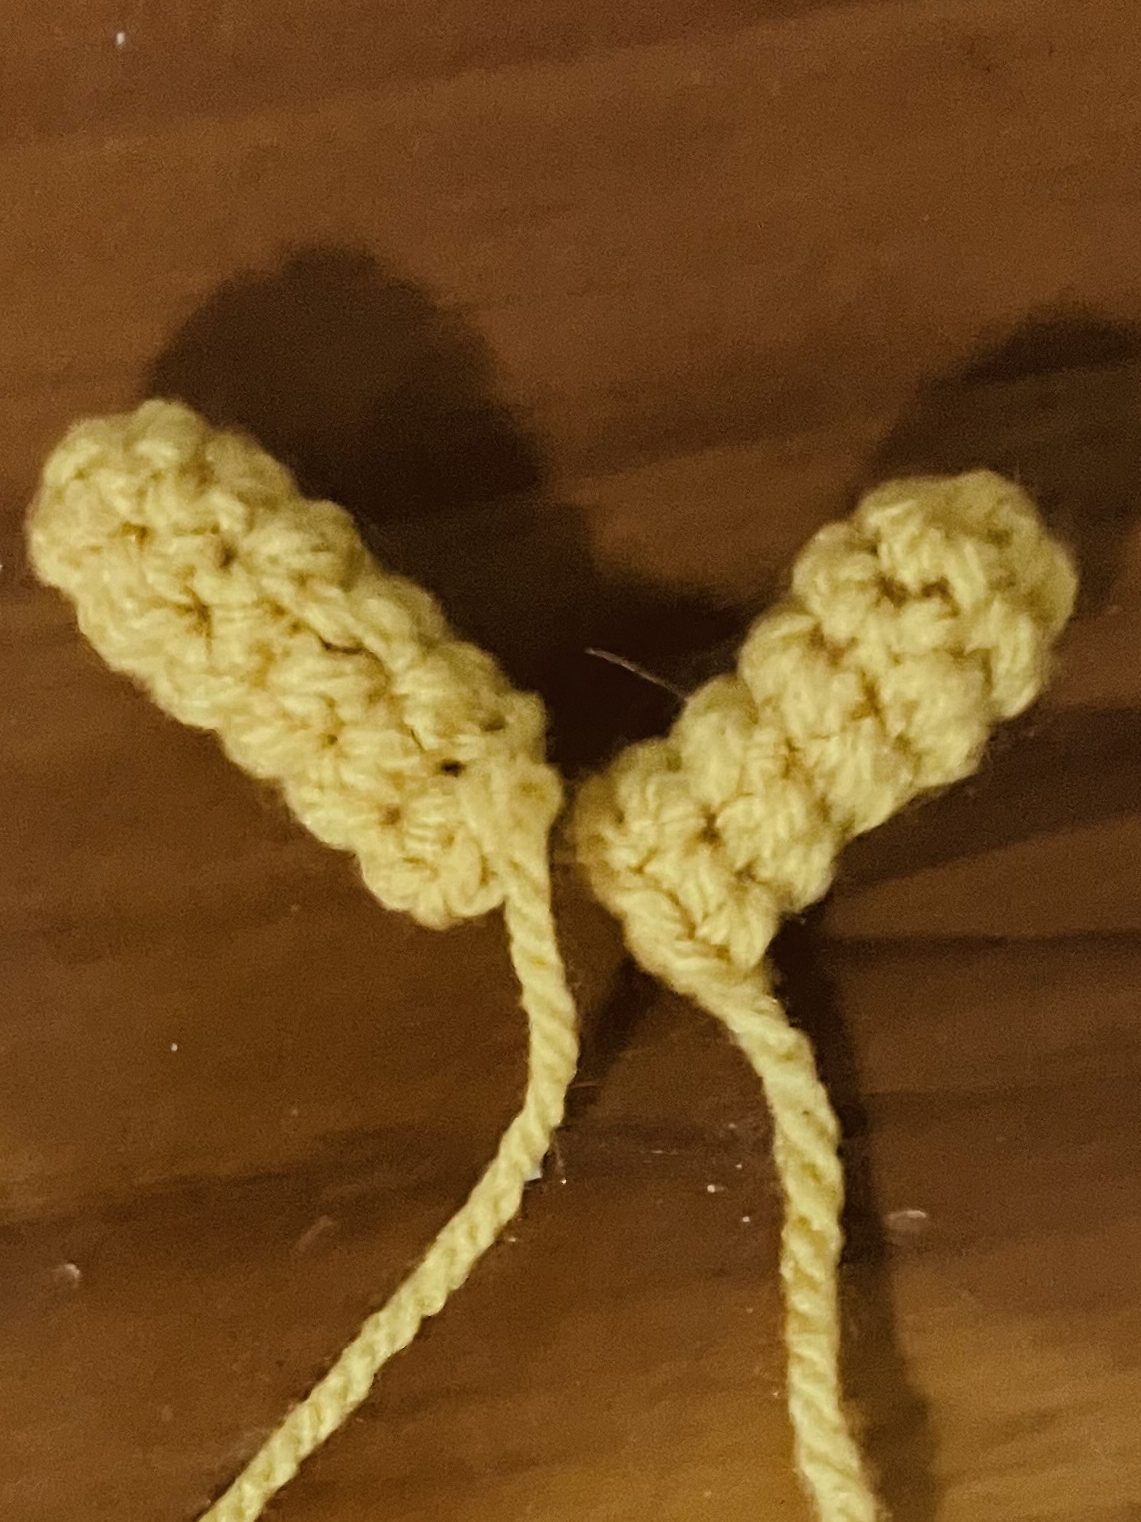
With the tail attached we can move onto the ears. I do not stuff these as I like to place a curve in the ears to recess the cream colour and give them a 3D look. The inside edge of the ears are usually in line with the eyes (below image) and I curve it around the top of the head (see above birds eye image). I like to have a slight angle towards the front of the head so you can still see the cream colour but it gives the illusion of the inside of the ear. If you have a different way I would be more than happy for you to share it with me! I would love some feedback.
With the nose this is placed central below the eyes. You shouldn’t need to stuff this as the shape should create a pointed end.
Placing the shoulder pads-depending on where you have placed the arms you want to start almost all the way down the side of the arm and attach it in a curved way to fit evenly over the ‘shoulder’. This creates a pauldron shape. Again ensure you have either slip stitched your tail to the long edge or weave it there so you can attach the correct side to the body. If you have weaved then check which way up suits/looks better before attaching.
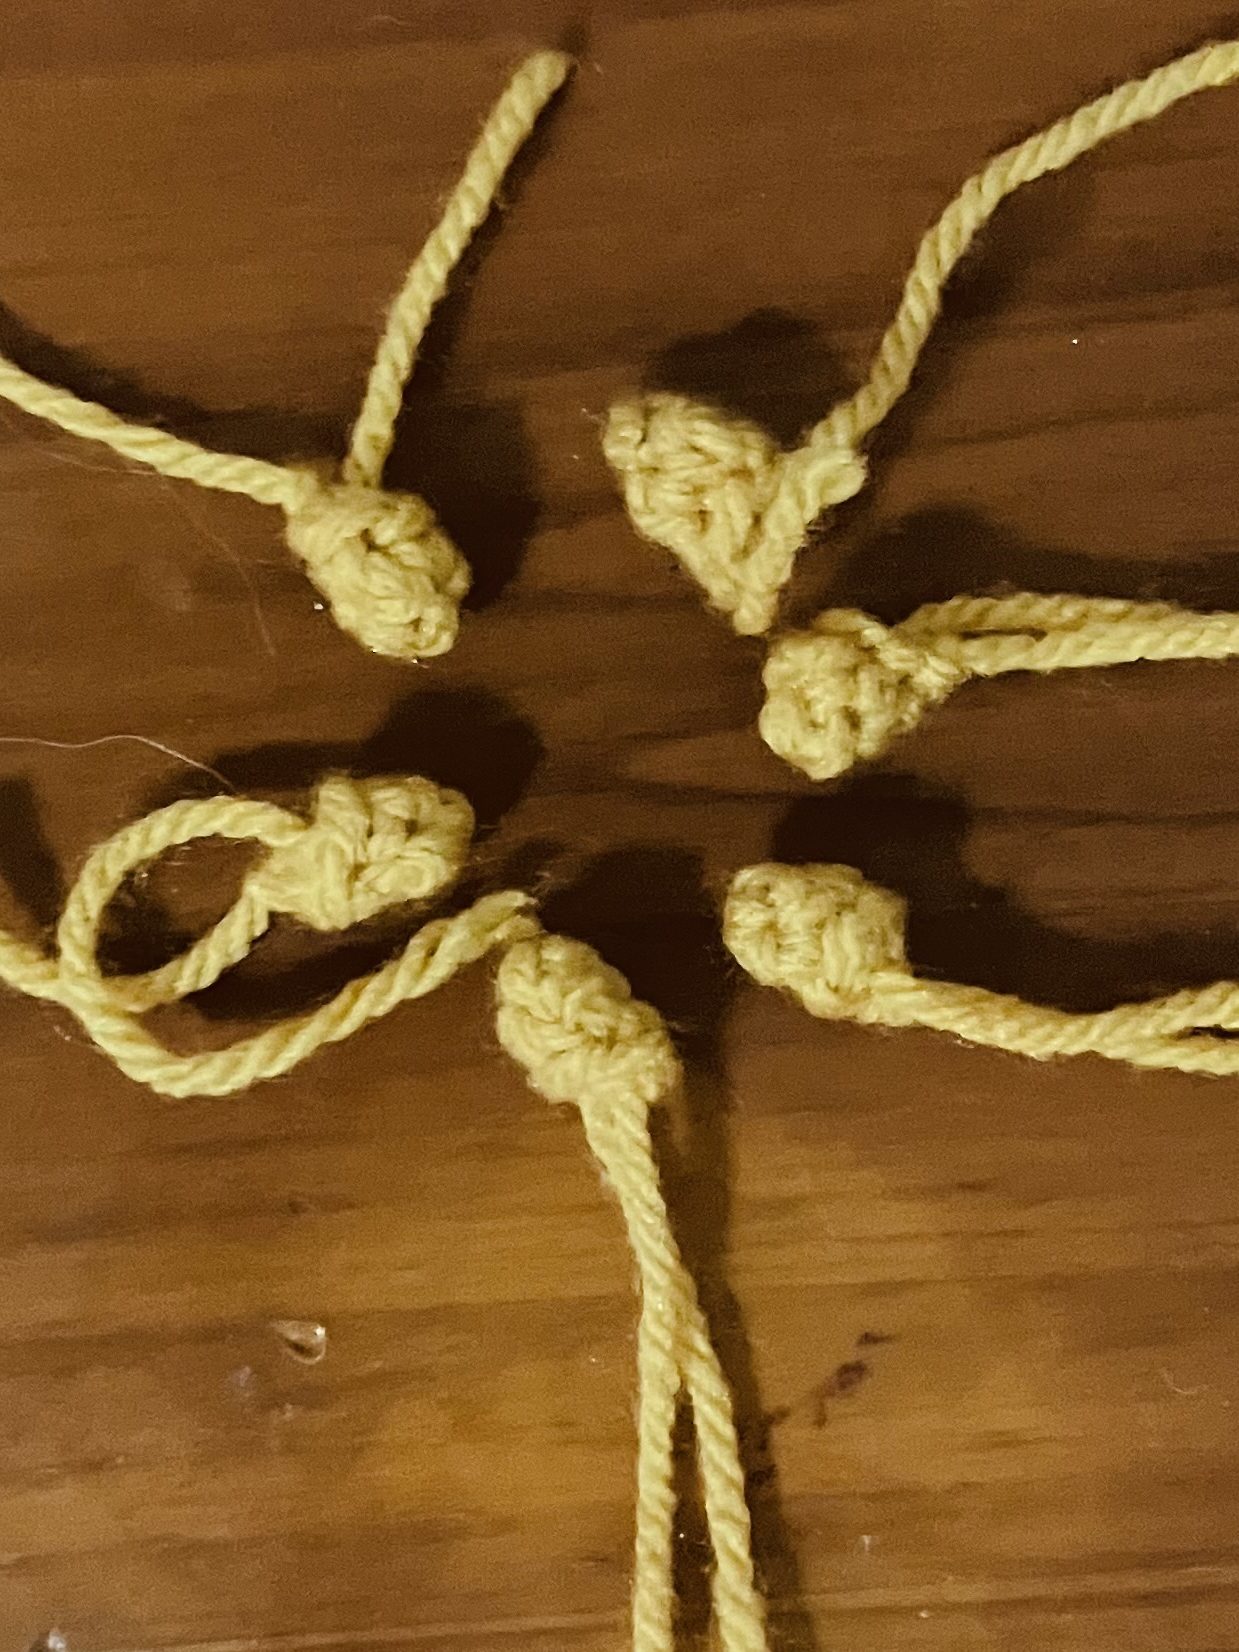
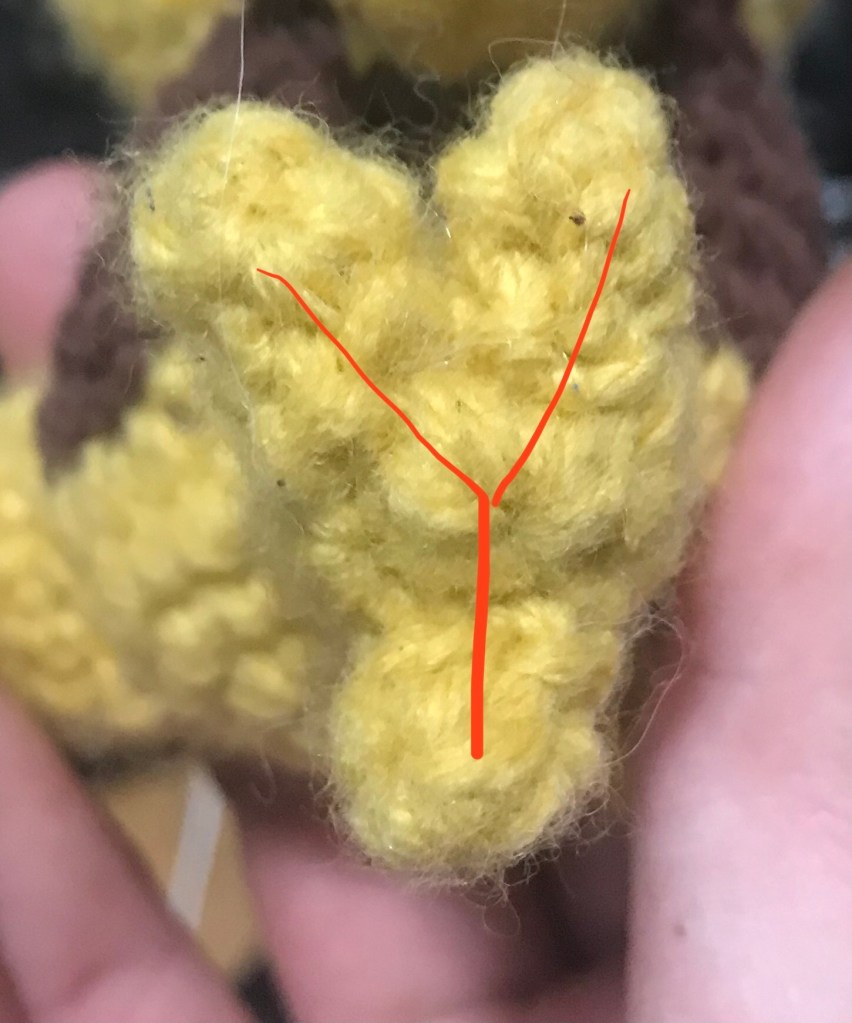
Lastly the toes. There are three toes per leg – two on the top and one on the bottom. I usually leave the MR of the leg visible & use that as a guide to create a Y shape with the toes. These you also do not need to stuff – they are too small to bother or try.
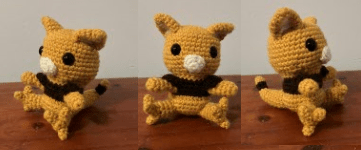
And that is it! You have a complete Abra! I hope you enjoy making it and if you have any feedback please let me know!! Pattern making and crocheting in general is still new to me as I have only been doing this hobby since July 2023.
wow!! 101Lucario – the Aura Pokémon

Leave a comment