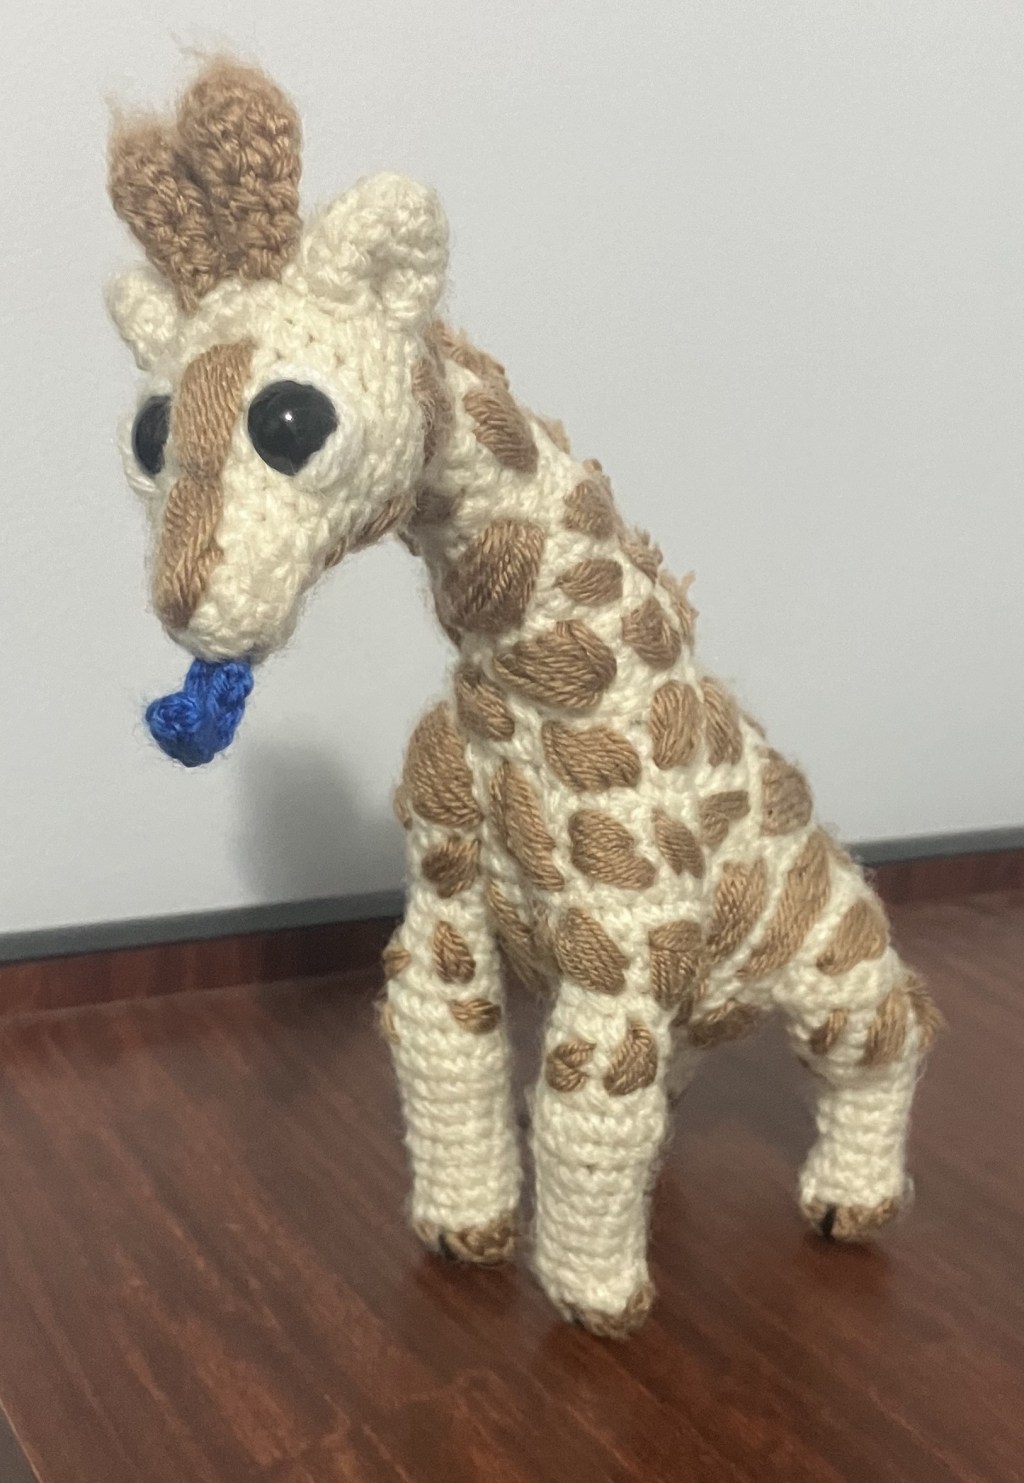
Hey everyone. My name is Shakiri and I was born in Somalia. I really enjoy all fruits, shrubs, leaves and tall grasses however I am not too keen on stripes, polo shirts and sore throats!
This pattern is available using the Buy Now button below. This will take you to Ravelry. You do not need an account with them to purchase this pattern.
Shakiri the Giraffe: $5 AUD

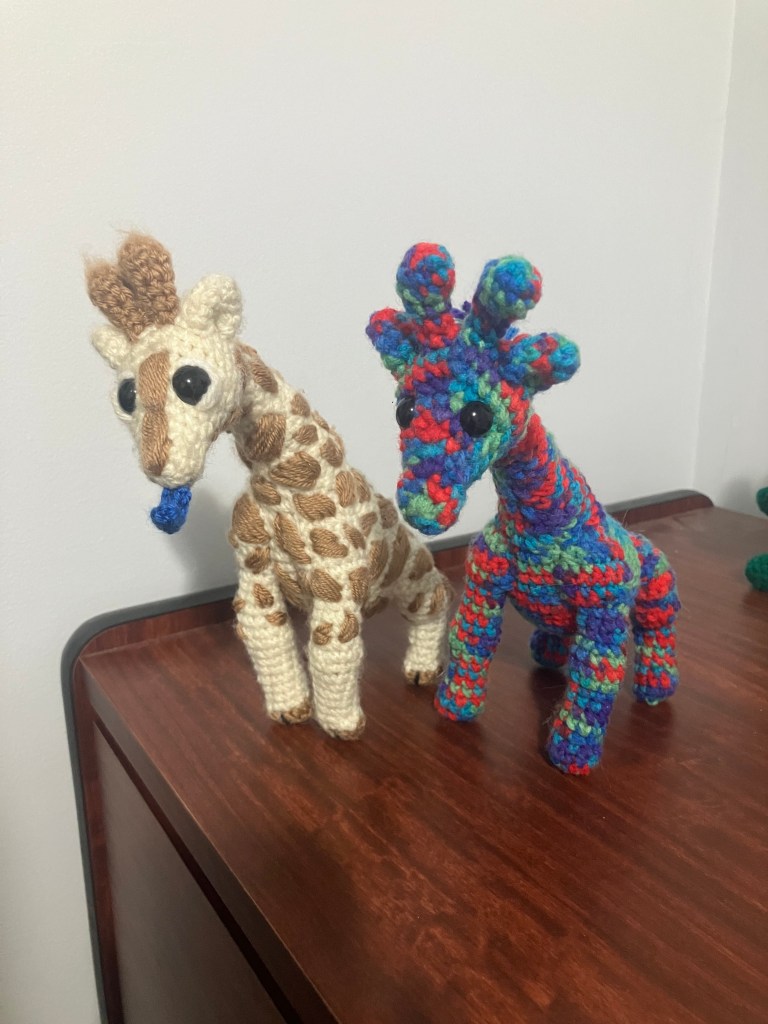
Alternatively if you would like to make this amigurumi for you, you have two options. I can either complete it in a multiple colour yarn to create a blotch pattern or complete it in a single colour. If you would like one of these please use the Contact button and submit a request there.
Lastly you can also find this and all my other patterns on my Patreon
Note
– I am based in Australia so currently only able to post locally unless you would like to pay for international shipping.
– Due to the time it takes to embryoid the patches unless you want to pay double or more on the base price of one of these I do not have the time to complete this. I have yet to work with felt on my crochet pieces so have little experience here.
Information you need to know before purchasing:
Abbreviations (US):
Sc: Single crochet
MR X: Magic Ring with X amount of sc in it
Ch: Chain
ss: Slip stitch
HccX>Y: Half colour change single crochet – complete the tower of the crochet in X colour & loop in Y colour
Inc: Increase by 2
Inc X: increase by X
Dec: Decrease
3 tog: 3 Together Crochet – pull up the next 3 front loops on your hook, yarn over & pull through three, yarn over & pull through two loops.
Sp: spike stitch – complete tower of crochet by inserting hook into stitch/loop below the current stitch instead.
R: Round
X(…) : Repeat stitches within parentheses X times
Tools and Materials:
- 3.5 mm or E/4 Crochet hook
- tapestry needle and scissors
- polyester fiberfill stuffing
- 12 mm safety eyes
- Metal brush for teasing out yarn
- Yarn: 8PLY/DK 100% Acrylic
- Yellow or Off White for skin (Y)
- Brown – pick a shade that you like (B)
- Optional – Blue (tongue)
- Optional – Black (toes)
Final Size: ~20cm tall – size varies depending on where legs are attached
Technical Notes and Gauge:
- If there is something specific about a section I will note it there and it is only applicable to that section.
- Crochet in continuous spiral rounds, unless specified otherwise. Use a stitch marker or piece of yarn to keep track of the last stitch in each round. I usually pull the tail of the MR through when needed as my stitch marker and move it up when required.
- This pattern has colour changes between the rows. You need to be comfortable completing these.
- I have a specific way to complete this using SS, HCC & SP stitches. If you have another way you complete this please do what is comfortable to you. I just don’t like having to switch to a threading needle
- If multiple colours for a piece are used I will note in superscript which colour to complete the crochet in. eg. R1: 12scY, R2: 12scG = x12 sc in yellow for round 1 & x12sc in green for round 2. Find the superscript abbreviation in the Yarn section of Tools & Materials.
- If I do not note the colour of a row assume it is the same colour as the previous row
- When filling with polyester stuffing, pull apart each large chunk into many smaller chunks. This ensures an even distribution of firmness within the amigurumi.
- Use sewing pins to secure limbs of the amigurumi before you sew them.
- Gauge: 5 rows of 5 sc = 1” x 1” or ~2.5cm x 2.5cm
- Stitch count will be summarized at the end of each row in brackets
- This pattern requires you to be comfortable doing embroidery. You may be stitching the brown patches of the body with a tapestry needle after constructing all the pieces together.
- There are some images at the end of here to help you with certain sections. Please refer to them if you struggle/want reference for any parts – will be noted as (Fig X) at end of Row/sentence.
This pattern is relatively easy in that there are not any complicated stitches. The colour change for the legs is optional and not required and I complete this in a way that I don’t have to thread a needle and make it a little more seemless. It will still look good in just your main colour. I have noted that you can use yellow or white because Giraffes are usually more off white/cream skinned with lighter brown patches than yellow and dark brown. However it is your project so pick the colours you want! I have also tried to keep the body shape accurate to real life but still trying to keep it a little cute faced and able to stand up. Hence the thickness of the legs and facial expressions.
About the Development of this Pattern
This is my second in my ‘Wildlife of the World’ series and while it has taken a long time to come out I’m happy I took the extra time to get it right. You also may look at this pattern and think – ‘This is completely different to all your other work’ – and yes imaginary reader you are right. I had originally wanted to complete one in a similar style to Gerald and my other Pokémon patterns from 2023 however in looking online there are so many already like this. So instead of adding one to an already saturated market I thought I would give a more lifelike version a go. This was something I actually couldn’t see a lot of.
The pattern went through a couple iterations from having a slightly curved neck to having toes. Because Giraffes are ungulates I wanted to ensure that I tried to keep it visually similar to the giraffes we see today.
Completing the head was one of the easiest pieces and in hindsight I should’ve done this after making the body. I was just very fortunate that my body had the correct proportions to the head. So for all of you imaginary aspiring pattern developers my one piece of wisdom – Make the BIGGEST piece first! The body for this pattern was tricky to get right. More so from where the body turned to the neck. The was a lot of decreases I needed to do but couldn’t have them too far up in the round or it puckered the neck weirdly. But having so many in the same place made loose stitches in which you could start seeing stuffing even when minimally stuff. What helped? I actually watched a bit of Complicated Knots on Youtube and her Big Snake pattern helped a bit. I highly recommend checking her out. Seeing the 3 together stitch really helped keep things condensed and smoothen things out.
The last trickiest section I had was attaching the legs. Every time I thought I had them in a good position when I tried standing the toy up it wouldn’t be as tall as I wanted and slouched. Why you may ask? Because I wasn’t pinning them in place first. So please make sure you do this when completing yourself! Also after I had attached my toes (no longer in the pattern) in order to ensure they weren’t floating in space I had to rotate the legs which again brought the neck down to a slouching position.
Anyway I really enjoyed developing this pattern so I do hope you enjoy crocheting it too. Thanks for reading this far! If you want the pattern yourself you can find it on Ravelry or use the buy now button on the top of this page or below. Otherwise you can subscribe to my Patreon and get access to this pattern and all my other ones for one monthly price
Shakiri the Giraffe: $5 AUD

Leave a comment